
1. Introduction
If you’re looking to equip yourself with a killer gaming PC, there are two distinct schools of thought on how to do it.
Generally speaking, the first school is the safer option – just have someone else build your PC for you. The obvious benefit here is that your PC is guaranteed to work straight out of the box. If you don’t feel comfortable messing around with all the components, the option is always there.
However, the first school is considered heresy among the second – they believe you should build your own computer, no matter what. The obvious benefit here is that you can decide what goes into your PC on your own, and you can also gain a deeper understanding about how your PC works that you wouldn’t necessarily have otherwise. That’s not to mention the money you save when you don’t have to pay someone to build it for you.
Here at TechRadar, we tend to represent the second camp, but we’re big enough to understand that a lot has changed over the last few years, and deciding which school to follow isn’t as straightforward as it once was.

Our rig will play GTA V like a boss
Cheaper chips
In the past, building your own PC had the advantage of being the cheaper option. Unfortunately, due to the rising prices of the best graphics cards, due in part to the cryptocurrency craze, that’s not necessarily true anymore. Even if Nvidia may be designing graphics cards designed for cryptocurrency miners and some retailers are trying to combat miners, it can be difficult to find a good deal on a GPU.
Many of the more expensive systems do still have the potential for decent savings, but that margin has disappeared in some of the machines we've looked at recently, especially at the cheaper end. This leaves the main reason to build as making sure you don't waste money on components you don't really need. You get to spend the money where it matters most to you.
Like, for example, say you wanted to build a PC that will ably handle PlayerUnknown’s Battlegrounds, but also have enough raw horsepower to handle 2018’s other big PC gaming releases, like Monster Hunter World and Far Cry 5, then you could set out to build a machine that pushes graphics performance above everything else.
Which is what we're focusing on over the next few pages: a pure gaming machine. But you can follow the general gist of this guide to build whatever it is you want – focusing on whichever area you need your machine to excel in.
2. Component selection
Create your perfect PC with these fine ingredients. (Note that prices are approximate and may differ from the time of writing.)
CPU
Intel Core i5-4590 - £158 (around US$251, or AUS$323)
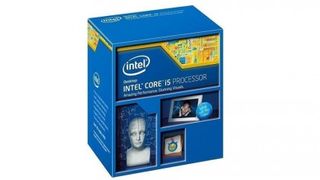
Intel has stolen a lead over AMD of late, and as games continue to make more and more use of multiple core architectures, we don't see that lead diminishing. If you've got a bit more cash and have a penchant for overclocking, then the unlocked Core i5-4690K is a great buy, but as overclocking isn't guaranteed to net you a boost in your games, this Core i5-4590 makes more sense financially.
It still boasts a refresh of the Haswell core, turbos up to 3.7GHz from its base of 3.3GHz and has a healthy 6MB of L3 cache. The retail spin includes a cooler, which is fine if you're not overclocking.
Motherboard
Asus H97M-E - £72 (around US$114 or AUS$147)
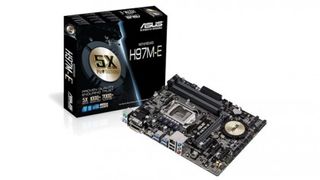
The H97 chipset that you'll find powering this motherboard is almost identical to the top-end Z97 chipset, but with one notable exception – it doesn't officially support overclocking. Given that we've suggested using a locked processor, that isn't an issue, and means we can go for a more price conscious system.
The Asus H97M-E is a bargain motherboard, that give your Socket-1150 Core i5-4590 plenty of room to breath, while supporting USB 3.0 and SATA 6GB/s interfaces as well as an M.2 slot. The only other point of note is that this Asus motherboard only has one full-length PCI Express 3.0 slot, which means that SLI/CrossFire is out, but we really don't see that as an issue right now.
Graphics card
AMD Radeon R9 290X - £260 (around $413, or AUS$531)
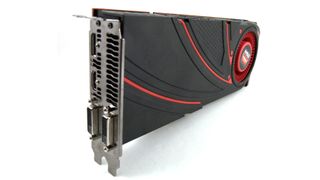
Nvidia may have incredible graphics chips right now, but when it comes to knock-out value, it's hard to beat AMD's R9 290X. Available for as little as £260 (about $360, AU$460) if you shop around, the R9 290X has benefited from successive driver updates recently, putting it neck and neck with the more expensive GeForce GTX 970. AMD's chip runs hotter than Nvidia's, but beyond that there isn't much in it.
Plus with the high prices that newer GPUs are experiencing thanks to cryptocurrency, both of these cards will be affordable for many.
Both cards will happily run GTA V at high/highest settings, and will handle the likes of The Witcher 3 too (if the recommended specs don't change). If you tend to side with the Nvidia camp, there's nothing wrong with buying that card over this, despite the whole 3.5GB VRAM debacle.
Storage
Crucial MX100 512GB SSD - £145 (around US$230, or AUS$296)
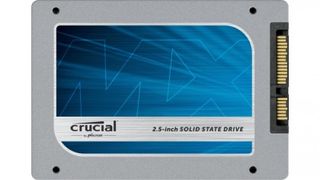
We've been totally won over by SSDs now, and can't imagine loading from a spinning drive, even if our wallets depended on it. There is a slight problem here of course, which is that games are getting bigger and bigger: GTA V weighs in at 65GB.
Factor in the size of the OS itself and a few more games, and those affordable 128GB SSDs aren't as tempting as they once were. We see 256GB as the bare minimum these days, and even that's going to be swallowed up by a modest Steam collection. This is why we recommend the delightfully affordable.
Power supply
XFX Core Edition 550W - £49 (around $77, or AUS$100)
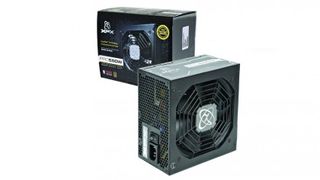
Intel has really hammered down on its power draw with its latest processors and motherboard chipsets, which means you don't need a particularly meaty power supply in order to run them. SSDs aren't as hungry as hard drives either, so it's really only the graphics card that's going to tax your PSU of choice.
Better yet, the R9 290X isn't too demanding, so the whole system is still going to be sat at something under 400W, even under full load. The extra power capacity gives you options for upgrading as you go, and it also means that the PSU is running efficiently. Go with a name you can trust and you shouldn't have a problem, which is why we've gone for the XFX unit.
Memory
Corsair 8GB (2x 4GB) DDR3 1,333MHz - £54 (around US$84, or AUS$132)
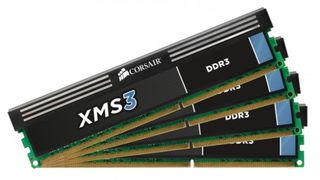
If there's one area where modern games are more exacting than their predecessors, it's on the memory front. Speed isn't so important, but capacity is. These days, 4GB has become the absolute minimum, with 8GB now the recommendation. And if you can stretch to it, jumping straight to 16GB isn't an awful idea.
In the interests of keeping the overall costs down, we've built this machine around a pair of 4GB DIMMs. You don't have to doggedly track down the particular model number, just go with whatever deal you can find as you're buying the rest of the components. Big names make sense for easier upgrades later of course, but beyond that you've basically got a free rein.
Chassis
Corsair Carbide 200R - £48 (around US$76, or AUS$98)

We've recently built several machines using smaller chassis, just because they no longer limit your component selection, but it's still great to go back to building in a bigger case. The Corsair Carbide 200R impressed us the moment we saw it, and it continues to set the standard by which we judge other chassis.
The tool-free design makes it easy to build in, and there's plenty of room for the R9 290X, due to the fact the drive cages are split at just the right point to accommodate this long card. Cut-outs make cable management as easy as you could hope for, and there's plenty of room for extra cooling should you need it as well. This is an incredible case for the money.
3. Piece it all together
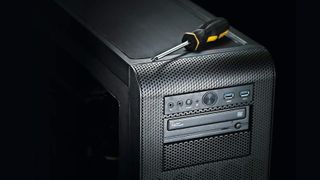
It's time to piece it together, and you'll need this screwdriver:

The Carbide 200R may be a tool-free case, but you'll still need a screwdriver when it comes to securing your motherboard in place.
Before we start, it's worth pointing out that we've made some assumptions when it comes to kit you already own. We take it for granted, for instance, that you have a screen you can plug your new PC into. We also suspect you already have a keyboard and mouse. We assume you've an internet connection - as you may have noticed there's no optical drive. Honestly, we just don't use them any more, and the only thing we can think of doing with them is ripping old music CDs, and even that seems like a hassle.
If you do need one, for whatever reason, we'll work on the basis that you've got one laying around from an old PC that you can cannibalize for the purpose. Failing that, you can pick one up for around £10.
Let's build!
1. Inside out
Remove the motherboard on top of the antistatic bag in which it arrived and then drop the processor in place. Slot in the two memory sticks and gently slide your graphics card into place.
2. Grease-up
Before you attach the CPU cooler to the board, remember to dab on a blob of thermal grease [Image A]. This will ensure that there is good contact between the top of the chip and cooling plate, filling any small scratches and bumps on either surface with thermally conductive goo. A blob roughly the size of a couple of grains of rice will suffice. Don't worry about spreading it; simply attaching the cooler will ensure that it squidges out in a nice even layer.
3. Power play
to the processor socket on this motherboard. Do this without the PSU attached to the mains, just to ensure that everything is plugged in before you give it a jolt. Make sure the main ATX cable is attached, as well as the 8-pin CPU power cable [Image B]. You'll need to attach the 6-pin and 6+2-pin PCIe connectors to the graphics card, too.
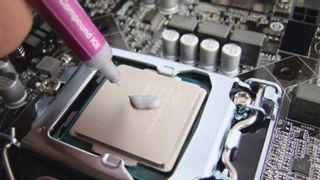
Image A
4. Naked boot
Don't worry about attaching your drives at this point. Connect your screen to your graphics card and plug in your keyboard. Power up the PSU and start up the barebones machine – short the power pins on the front panel connector with a screwdriver to get your machine up and running. Check the manual for the PWRBTN location on the mobo.
5. Bios beware
What we're checking for here is that the machine starts up, its fans spin, it gets to the POST screen and it allows you into the BIOS. When it reaches the motherboard logo screen, hit [Delete] and the rig should enter the BIOS setup. Make sure the motherboard is reporting the correct CPU and the right amount of RAM.
6. Start again
Hurrah, the core is working as it should so far! Now shut down the machine and unplug the PSU. Disconnect the power cables from the motherboard and remove the graphics card. You can leave the RAM, CPU and cooler in place as you drop it into your waiting case.
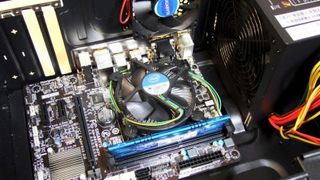
Image B
7. Steady supply
Before you drop the heart of your rig into its new chassis, get the PSU in place first. The Cthulhu's maw of tentacles sprouting from the power supply is much more difficult to manage when the other components are already in place. Orientate the PSU so the intake fan is positioned to suck in air from the outside.
8. Board meeting
Now it's time to get the good stuff in, so attach the mobo backplate into the chassis. Pulling the mass of cables out of the way – you don't want to accidentally trap any leads – screw the mobo risers into the chassis and drop the board in place.
9. Drive time
The next component to add to your Carbide 200R is the bargainous MX100 SSD. You have plenty of options as to where you actually mount this drive, but we've gone for the racks at the front bottom of the case. Attach the SATA cable and you're ready to move on.
10. Be discrete
It's now time to install your Radeon R9 290X. Ensuring you're not trapping any errant wires, drop the graphics card into the primary PCIe slot and screw the bracket into the chassis to keep it safe and secure.
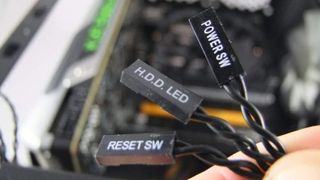
Image C
11. Panel power
Plug the chassis front panel connectors to the motherboard pins [Image C]. It's worth consulting the manual to locate the connector for the front panel audio and USB headers. You know where the power pins are – the reset switch, storage and power lights will be in the same place. Attach the cables securely.
12. Cable ties
obstruct the airflow throughout the chassis. Plug in the long motherboard power cable first, and then the CPU, GPU and storage power connectors, and make sure the fans are powered too.
13. Clear air
That's all the essentials taken care of, so now you're ready to connect your screen, keyboard and mouse. Leave the side off the case when you boot up for the fi rst time so you can ensure all the fans are spinning properly. Press the power button and your build should spring into life. Once
14. RAM-ing speed
In the BIOS, check that the CPU temperature is normal (anything below 40-50ºC) and make sure the storage drive is now visible and set as the primary boot option. It's also worth nipping in to check the RAM settings and get the sticks running at their rated frequency using
the relevant profiles. Save your BIOS settings and exit.
the relevant profiles. Save your BIOS settings and exit.
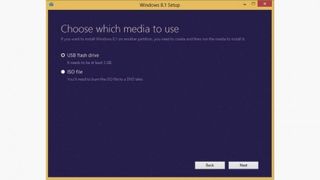
Image D
15. OS Install
With modern rigs, you're unlikely to have an optical drive to install your operating system from, so you'll need to create a USB install on another PC [Image D]. Check out http://goo.gl/XCqsWo to read our easy guide to making a Windows 8.1 install. If you're feeling brave (and haven't bought a Windows licence), you can download an ISO of the Windows 10 preview installation, which we've been using for a while and had absolutely no problems with.
16. Boot and go
With your chosen USB media attached, boot from it via the BIOS and go through the setup procedure. Whatever OS you're running, this is pretty painless these days. Once completed, the most important thing will be to make sure that you have net connectivity. When you're done, update your graphics card drivers.
A PC for the games to come
We've put together a great PC without spending a fortune. This is testament to the current state of the PC industry – there's incredible hardware at the high end, but aim slightly lower than that and you have the perfect combination of great performance and fantastic value for money.
Here is a machine that will last you at least a couple of years of cutting-edge gaming, yet it doesn't have the kind of price tag that you'd expect. With the hardware rolling in at under £800, there's a lot to like here.
We've built this machine with a specific purpose in mind – getting the most out of the serially delayed GTA V (and as an aside, the soon-to-be- released The Witcher 3: Wild Hunt). Whatever reason you're building your machine for, the same underlying logic behind component selection and the building process remains the same.

Embark on a wild hunt
As for this build, the good news is that all those delays to the release of GTA V appear to have been spent tweaking and honing the engine to make sure that it's optimised for PC. We ramped pretty much every setting we could find to maximum and the game continued to run at 60fps.
One setting we would recommend hunting out is the High- Resolution Shadows setting, which can be found under the Advanced Graphics setting menu – this just makes an incredible difference to how great the game looks. To be fair, this machine is probably overkill for GTA V.
You could build a much cheaper gaming PC that would still hit 60fps in Rockstar's latest. Ultimately, we've aimed so very much higher here because we just wanted to build a rig that will be able to handle anything that's going to be released this year. To that end, we're happy with what we've achieved for.
PC Format is the magazine for PC gamers and hardware enthusiasts, created by geeks and gamers. Each issue covers the latest advances in graphics cards, processors, motherboards, memory, SSDs and complete systems. We also feature guides on overclocking, tweaking, system building, system modding and PC repair. Click here to subscribe

Aucun commentaire:
Enregistrer un commentaire